To begin, we looked at several images of butterflies and discussed symmetry. I showed them pictures of different things and the class had to say whether the item was 'symmetrical' or 'asymmetrical'. This helped the concept sink in for a lot of kids.
Step One: Draw the head, body and antennea. Wings come next...if they started the wings too small, I just had them echo the wings a second time to reach out to the edge of the paper.
 |
| This is a Kindergarten student...I did this with K also....we used those large tongue depressors for the body so they would draw LARGE! Got this whole project idea from deepspacesparkle.com by the way! |
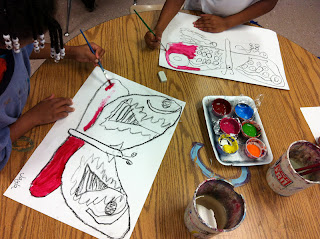 |
| Step 2: Outline all pencil lines with a bold, black oil pastel. |
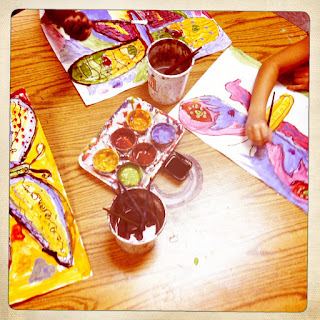 |
| Step 3: Begin painting with tempera. I set out trays with 6 colors and I created some shades in those paints....just to make them bolder. They turned out great! |
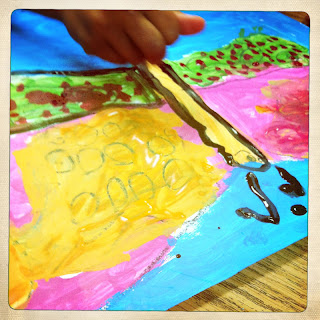 |
| Step 4: optional....we did this the next class after the butterflies were dry. Some kids needed extra time to finish painting their backgrounds and others could start adding designs on top of their dried paint...which turned out to really pop! Anyway, we used watered down (not too much!) black tempera to re-outline our butterflies. I don't think I've ever used this technique, but it really brought the whole thing to life. |


